Tracker Video Analysis
The Tracker software can analyze the motion of object(s) in a video you have recorded. The videos and written description below will help you to set up and use this program.
Installing Tracker
Analyzing a Video
Walkthrough
Start the tracker program and open your video. If your video is in quicktime format (i.e. iPhone, some digital cameras), the Tracker software will work most smoothly when using Quicktime to render video (as opposed to its built-in renderer). When first starting Tracker, go to “Edit” → “Preferences” and choose the “Video” tab. Check that “Quicktime” video rendering is selected. If not, select it and restart the program.
Calibrate the scale of the video by choosing “Track” → “New” → “Calibration Tools” → “Calibration Stick” from the menu. This will create a blue line on your video. Drag the ends of the line to match up with the meter stick in your video. In the “length” box above the video enter the length of the stick in meters. Now set the coordinate axes by selecting “Track” → “axes” → “Visible” from the menu. You can drag the axes at the center to reposition them. If your video is tilted with respect to horizontal and veritcal, clicking and dragging the small dash on the coordinate axes allows you to rotate them.

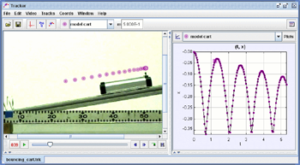
To track an object’s motion, choose “Track” → “New” → “Point Mass” from the menu. Now go to the first frame where you want to track the object. You can record the position of the ball in each frame by shift-clicking on it. This also advances to the next video frame, so you can hold Shift and quickly click through all the relevant frames to record the object’s positions.
In the graph window, click the “Plots” button and choose to show 3 plots. Click on the y-axes of the plots to choose which quantities to graph. Right click on one of the plots and click “Analyze” to open a dialog for fitting curves to data. Click the “Analyze” button in this window and choose “Curve Fitting” or “Statistics” to apply fits or calculate statistics of your data.

